Neural Net in your Phone:
From Training to Deployment through ONNX
Neural Net in your Phone:
From Training to Deployment through ONNX
From Training to Deployment through ONNX
Abstract
Abstract
Current smartphones are powerful enough to run neural networks locally without the need of a cloud server connection. But deploying and running a custom neural network on your phone is not straightforward and it depends on the operating system of your phone. In this post we will go through all the necessary steps to train a custom image classifier network model, export it with ONNX, convert it to Core ML (machine learning framework for iOS apps) and finally deploy it to your iPhone.
Get Images of Mushroom Species from your Region
Get Images of Mushroom Species from your Region
Mushroom season has already begun in the northern hemisphere. So it would be great to have a mushroom image classifier running locally on our phones in order to identify mushrooms while hiking. For building such image classifier we will need a good training set consisting in dozens of images for each mushroom species.
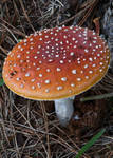
As an example, we can start with getting the species entity for the iconic mushroom, the fly agaric (Amanita muscaria) which even has its own emoji – 🍄
Interpreter["Species"]["Amanita muscaria"]
Out[]=
We can also obtain a thumbnail image to get a better picture of what we are talking about:
Out[]=
Thankfully, the community of citizen scientists has recorded hundreds of field observations for all kinds of mushroom species. Using function from the we can obtain images for each species. We first need to get INaturalistSearch function using :
ResourceFunction["INaturalistSearch"]
Out[]=
In the first argument we will specify the species, and then we will ask for observations with attached photos using “HasImage” option, and observations that have been validated by others using “QualityGrade” option and “Research” property:
In[]:=
muscaria=,"HasImage"True,"QualityGrade""Research",MaxItems200,"ObservationGeoRange"GeoBounds;
For example the data from the first observation is the following:
First@muscaria
Out[]=
We can easily import the images using the “ImageURL” property:
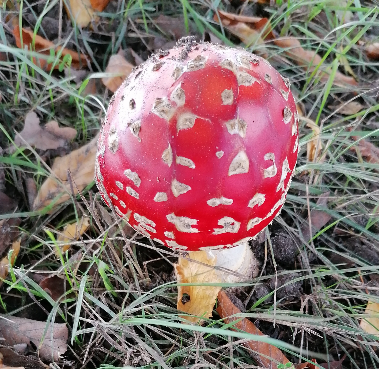
Import[First[muscaria]["ImageURL"]]
Nice! As a starting point, I’m interested in getting images of the most common mushroom species that can be found in my region (Northern Catalonia) of both toxic and edible mushrooms. Warning: Do not use this classifier for cooking without expert consultation! Toxic mushrooms can be deadly! 💀
toxicMushrooms=Interpreter["Species"][{"Amanita phalloides","Amanita muscaria","Amanita pantherina","Gyromitra gigas","Galerina marginata","Paxillus involutus"}]
Out[]=
,,,,,
edibleMushrooms=Interpreter["Species"][{"Boletus edulis","Boletus aereus","Suillus granulatus","Lycoperdon perlatum","Lactarius deliciosus","Amanita caesarea","Macrolepiota procera","Russula delica","Cantharellus aurora","Cantharellus cibarius","Chroogomphus rutilus"}]
Out[]=
,,,,,,,,,,
Let’s create a few custom functions to get the images URLs, import, resize and crop the images and finally export them into a folder for later use:
imageURLs[species_]:=Normalspecies,"HasImage"True,"QualityGrade""Research",MaxItems50,"ObservationGeoRange"GeoBounds[All,"ImageURL"]
In[]:=
squareImage[url_]:=Module[{img=Import[url],size},size=Min[ImageDimensions@img];ImageResize[ImageCrop[img,{size,size}],224]]
In[]:=
imagesDirectory="/Users/jofre/ownCloud/DeployNeuralNetToYouriPhone/Images/";
imagesExport[species_,tag_String]:=MapIndexed[Export[imagesDirectory<>StringReplace[species["ScientificName"]," ""-"]<>"-"<>tag<>"-"<>ToString[First[#2]]<>".png",#1]&,Map[squareImage,imageURLs[species]]]
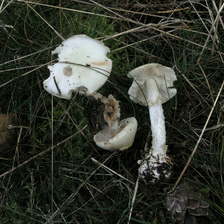
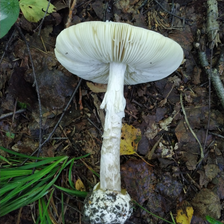
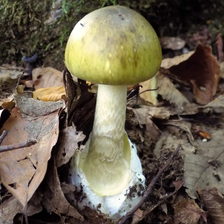
We can test the function using another toxic species, the death cap (Amanita phalloides):
imagesExport,"toxic";
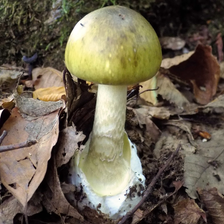
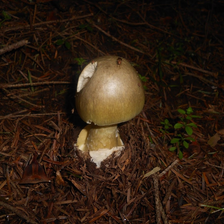
We can import a few death cap images from our local folder and check that they look ok:
Table[Import[imagesDirectory<>"Amanita-phalloides-toxic-"<>ToString[i]<>".png"],{i,5}]
Out[]=
,
,
,
,
Note that we cropped and resized the images in order to have 224x224 pixels:
//ImageDimensions
Out[]=
{224,224}
Now we can do the same for the rest of mushroom species:
Map[imagesExport[#,"edible"]&,edibleMushrooms]//Quiet
Map[imagesExport[#,"toxic"]&,Rest[toxicMushrooms]]//Quiet
Generate the training and test sets:
Generate the training and test sets:
In order to create the training and test set we need to specify the class labels:
In[]:=
classLabels={"Amanita-phalloides-toxic","Amanita-muscaria-toxic","Amanita-pantherina-toxic","Gyromitra-gigas-toxic","Galerina-marginata-toxic","Paxillus-involutus-toxic","Boletus-edulis-edible","Boletus-aereus-edible","Suillus-granulatus-edible","Lycoperdon-perlatum-edible","Lactarius-deliciosus-edible","Amanita-caesarea-edible","Macrolepiota-procera-edible","Russula-delica-edible","Cantharellus-aurora-edible","Cantharellus-cibarius-edible","Chroogomphus-rutilus-edible"};
Next we need to import the images and create the “examples” as follows:
In[]:=
all=Flatten@Map[Thread[Table[Import[imagesDirectory<>#<>"-"<>ToString[i]<>".png"],{i,50}]#]&,classLabels];
We have a total of 850 images; fifty for each of the seventeen mushroom species:
Let’s check the first example:
Nice! Finally, we only need to create randomized training and testing sets:
Perform Net Surgery for Transfer Learning
Perform Net Surgery for Transfer Learning
Starting from a pre-trained model we can make use of net surgery functions to create our own custom mushroom image classification network.
We can check wether the size of the network is reasonably small for current smartphones. As a rule of thumb it shouldn’t surpass 100MB:
Finally we train the net, keeping the pre-trained weights fixed:
We can check the resulting net performance by plotting the confusion matrix plot for the test set (using either NetMeasurements or ClassifierMeasurements ):
We can test the classifier using a photo from an iNaturalist user observation:
It’s a good practice to save our trained model. So in case we re-start the session we won’t need to re-train the net:
Export the Trained Net Model with ONNX
Export the Trained Net Model with ONNX
Checking that the conversion to ONNX was successful
Checking that the conversion to ONNX was successful
A quick way to make sure that the conversion to ONNX was done correctly is to import back the model and test its performance against the original model:
ONNX net models don’t store the encoder and the decoder. So, we need to dress our imported ONNX net with the original encoder and decoder in order to run the model:
Using the dressed net we can compare both net models and check wether the output probabilities are the same:
Great! The roundtrip is working well and now we are ready for converting the ONNX model into Core ML.
Convert the Model to Core ML
Convert the Model to Core ML
In this section we will make extensive use of a Python package called coremltools which Apple freely provides in order to convert external neural net models to Core ML (Apple’s machine learning framework for iOS apps).
Configure Python for ExternalEvaluate
Configure Python for ExternalEvaluate
In order to configure your system to evaluate external Python code I recommend you to follow this workflow: https://reference.wolfram.com/language/workflow/ConfigurePythonForExternalEvaluate.html
Setup External Evaluator for running Python code
Setup External Evaluator for running Python code
Once Python has been configured for ExternalEvaluate we need to register it as an external evaluator and start an external session:
Install required packages
Install required packages
For converting an ONNX model into Core ML we need to install two extra packages using the terminal:
Specifying the encoder and decoder during the conversion
Specifying the encoder and decoder during the conversion
Core ML models (.mlmodel) work similarly to Wolfram Language models. They also include an encoder and a decoder for the model. So, while converting the ONNX model to Core ML we need to specify the image encoder (preprocessing arguments) and the decoder (the class labels).
Preprocessing arguments (color bias and mean image)
Preprocessing arguments (color bias and mean image)
If we click on the “Input” port from our original Wolfram Language model we will see the following panel:
During the conversion we will need to specify that the input type is an “Image” and include the mean image values for each color channel as biases. Furthermore, we will need to specify an image re-scale factor since in the original model pixel values range from 0 to 1 and in Core ML the scale is from 0 to 255.
Save class labels as a text file
Save class labels as a text file
Coremltools allow us to specify the class labels of the model using a text file containing each class label in a new line. It is straightforward to export such a text file using Export and StringRiffle:
Python code to convert the ONNX model
Python code to convert the ONNX model
The following python code consists in three parts. Importing coremltools package and specifying the path to ONNX model. The code for converting the model and finally the code for saving the resulting Core ML model:
Deploy the Model to the iPhone
Deploy the Model to the iPhone
Before deploying the model we need to sign the development team of the app:
Once we drop/upload the model inside the Xcode project, we will see the following window for the model. The “Preview” section allow us to test the model directly using Xcode:
Finally, we need to replace the “Mobilenet” Core ML classifier model for our “MushroomsWolframNet” model in the “ImageClassificationViewController” swift file and then press the “Build and then run” button on the top left:
Test the Mushroom Classifier App in the Wild
Test the Mushroom Classifier App in the Wild
We did it! We just need to go hiking into a nearby forest and hope to find some mushrooms. 😋
See a few examples from last days (all correctly identified):
